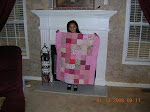
Well, Logan's autograph quilt is finished! It turned out pretty cute, even if I wasn't happy with the quilting. It is so hard to come up with little boy quilting patterns when you have so little talent!
I will give a brief recap of the process...who knows. With my terrible memory, I might read this someday and think it is a totally new idea!
First is Fabric Selection.
You need a light colored fabric for the signatures. A pure white would work (as would a beige or off white) but, in my opinion, would look boring! I chose a variety of white on white prints. Yes, I know. White on white fabric is terrible to sew with and quilt on, but I do like the look. I really wish they would come up with a manufacturing method to make white on white fabric that did not produce that rubbery substance!
Next, Fabric Preparation
You need to get the fabric cut into manageable squares and backed with freezer paper. I chose 7 inches by 7 inches. Now, there are two methods to do this. One is to iron on the freezer paper first and then cut out the squares; the other is to cut out the squares first and then iron on the freezer paper.
Since I wanted to tear the fabric (much faster!) I cut my fabric into squares first and then added the freezer paper.
A dry hot iron works best for adhering the freezer paper. Iron the wrong side of the fabric to the 'plasticy' side of the freezer paper. (I know it is actually a waxed paper and not plastic, but it does feel more like plastic.) The freezer paper will come off easily, so if in handling the paper seperates, just run a hot iron over it.
I found that the characters liked to sign into my seams, so adding a border of masking tape should help prevent that.
Next, transportation and how do you get the signatures on it!
Be sure to carry a small clipboard with you to make it easier for the characters to sign their blocks. I put the ready fabric squares, a fabric marker and clipboard into a plastic bag. The plastic bag kept the fabric squares clean and together. I added a second bag for the ones that had already been signed, and left them in the room each morning.
You can use either a fabric paint pen or a fabric marker. The marker gives a smoother line. Whichever you use, just make sure it is permanent.
If you will be getting multiples of each character, you might want to mark the signe squares with the date and place. I found it very difficult to remember which Mickey Mouse was from Garden Grill and which one was from Chef Mickeys!
Once you get back, throw the plastic bags into your sewing room and forget them....at least until you are ready to start the quilt.
At this point, it is entirely up to your imagination and creativity. You can make a very elaborate design using the blocks, or a simple square. I chose a simple square for this one...time was running out!
I used leftover fabric from the T shirts and dresses I made for the trip. On this first one it was for a little 18 month old boy, so I wanted to be careful and not make it too girly. I used primarily the fabrics from our Animal Kingdom outfits.It is just a simple alternating fabric and autograph block. I added a couple of blank blocks to add his name and date to. Before I sewed them together, I gave them a shot with the iron. The writing should have been permanent, but I didn't want to take a chance, so I heat set them.
From there it is just a simple straight stitch here and there to add the squares together and to complete the top. Quilt or tie it off, add the binding, and you have a one of a kind souvenier to last a lifetime!
Enjoy
Nini
Thursday, November 19, 2009
Subscribe to:
Post Comments (Atom)
Popular Posts
-
Not sure if this is all men, or if I am so blessed as to be the fortunate 'owner' of this particular type. First of all, I love my ...
-
I can never think of Roses without thinking of my mom. She loved roses. I don't think she ever had any rose plants after we moved from...
-
I guess I have worked all my life in customer service. I've worked in Food Service Industry, various office staffs, greeter at the USO,...
-
With a little over 11 days to go, I finally managed to get the last shirt done this afternoon. With each shirt taking about an hour to comp...
-
Only three more days! Stuff left to do: Finish Doll Dresses Make sure celebration is added to all ADRs Finish the kids pillows Finish the sq...
-
TBI A lot of you may know about the trip our family took with our youngest son, Mr D. But here is something not a lot of you know a...
-
It has been a while since I posted! I guess all the 'stuff' happening with the Grand Princess has put me behind on a lot of things...
-
I save every manual known to have ever thought about coming into my house! Even way after the item has long died the manual can be found in...
-
When did you first get paid for something sewing related? I vividly remember mine...I was 6. It was the summer between kindergarten and ...
-
This has been bothering me for some time. There are two current commercials out for Laundry detergents that have me scratching my head. I...
Brianna's Quilt

Brianna's First Quilt

No comments:
Post a Comment